How to Edit a Video Taken From Your Ipad
How to use LumaFusion for iPad: get to grips with the video editing app
A few years ago, the concept of editing videos – especially 4K videos – on a tablet seemed fairly laughable. But with the advent of devices like the iPad Pro, there are tablets out there now that are more than a match for your laptop or computer. And with apps like LumaFusion taking full advantage of touch controls, these days your iPad can even be the preferable option.
Not only does LumaFusion cost a fraction of the price of many desktop editing apps (it'll set you back a mere $29.99/£28.99), but it also offers some seriously tempting advantages, making it one of the best examples of video editing software around. You get the portability of the tablet itself, and if you're using an iPad, you get super precise editing thanks to the Apple Pencil 2. But as with any new software, getting started can feel a little daunting. Here are some of the basics to set you on your way.
To buy LumaFusion, visit your tablet's app store, or head to the LumaFusion website. And if you're in the market for an iPad to get the most out of the app, check out today's best Apple deals. Haven't filmed your footage yet? Master the basics of Filmic Pro with our handy guide.
How to use LumaFusion
01. Import clips into the app
(Image: © Future)
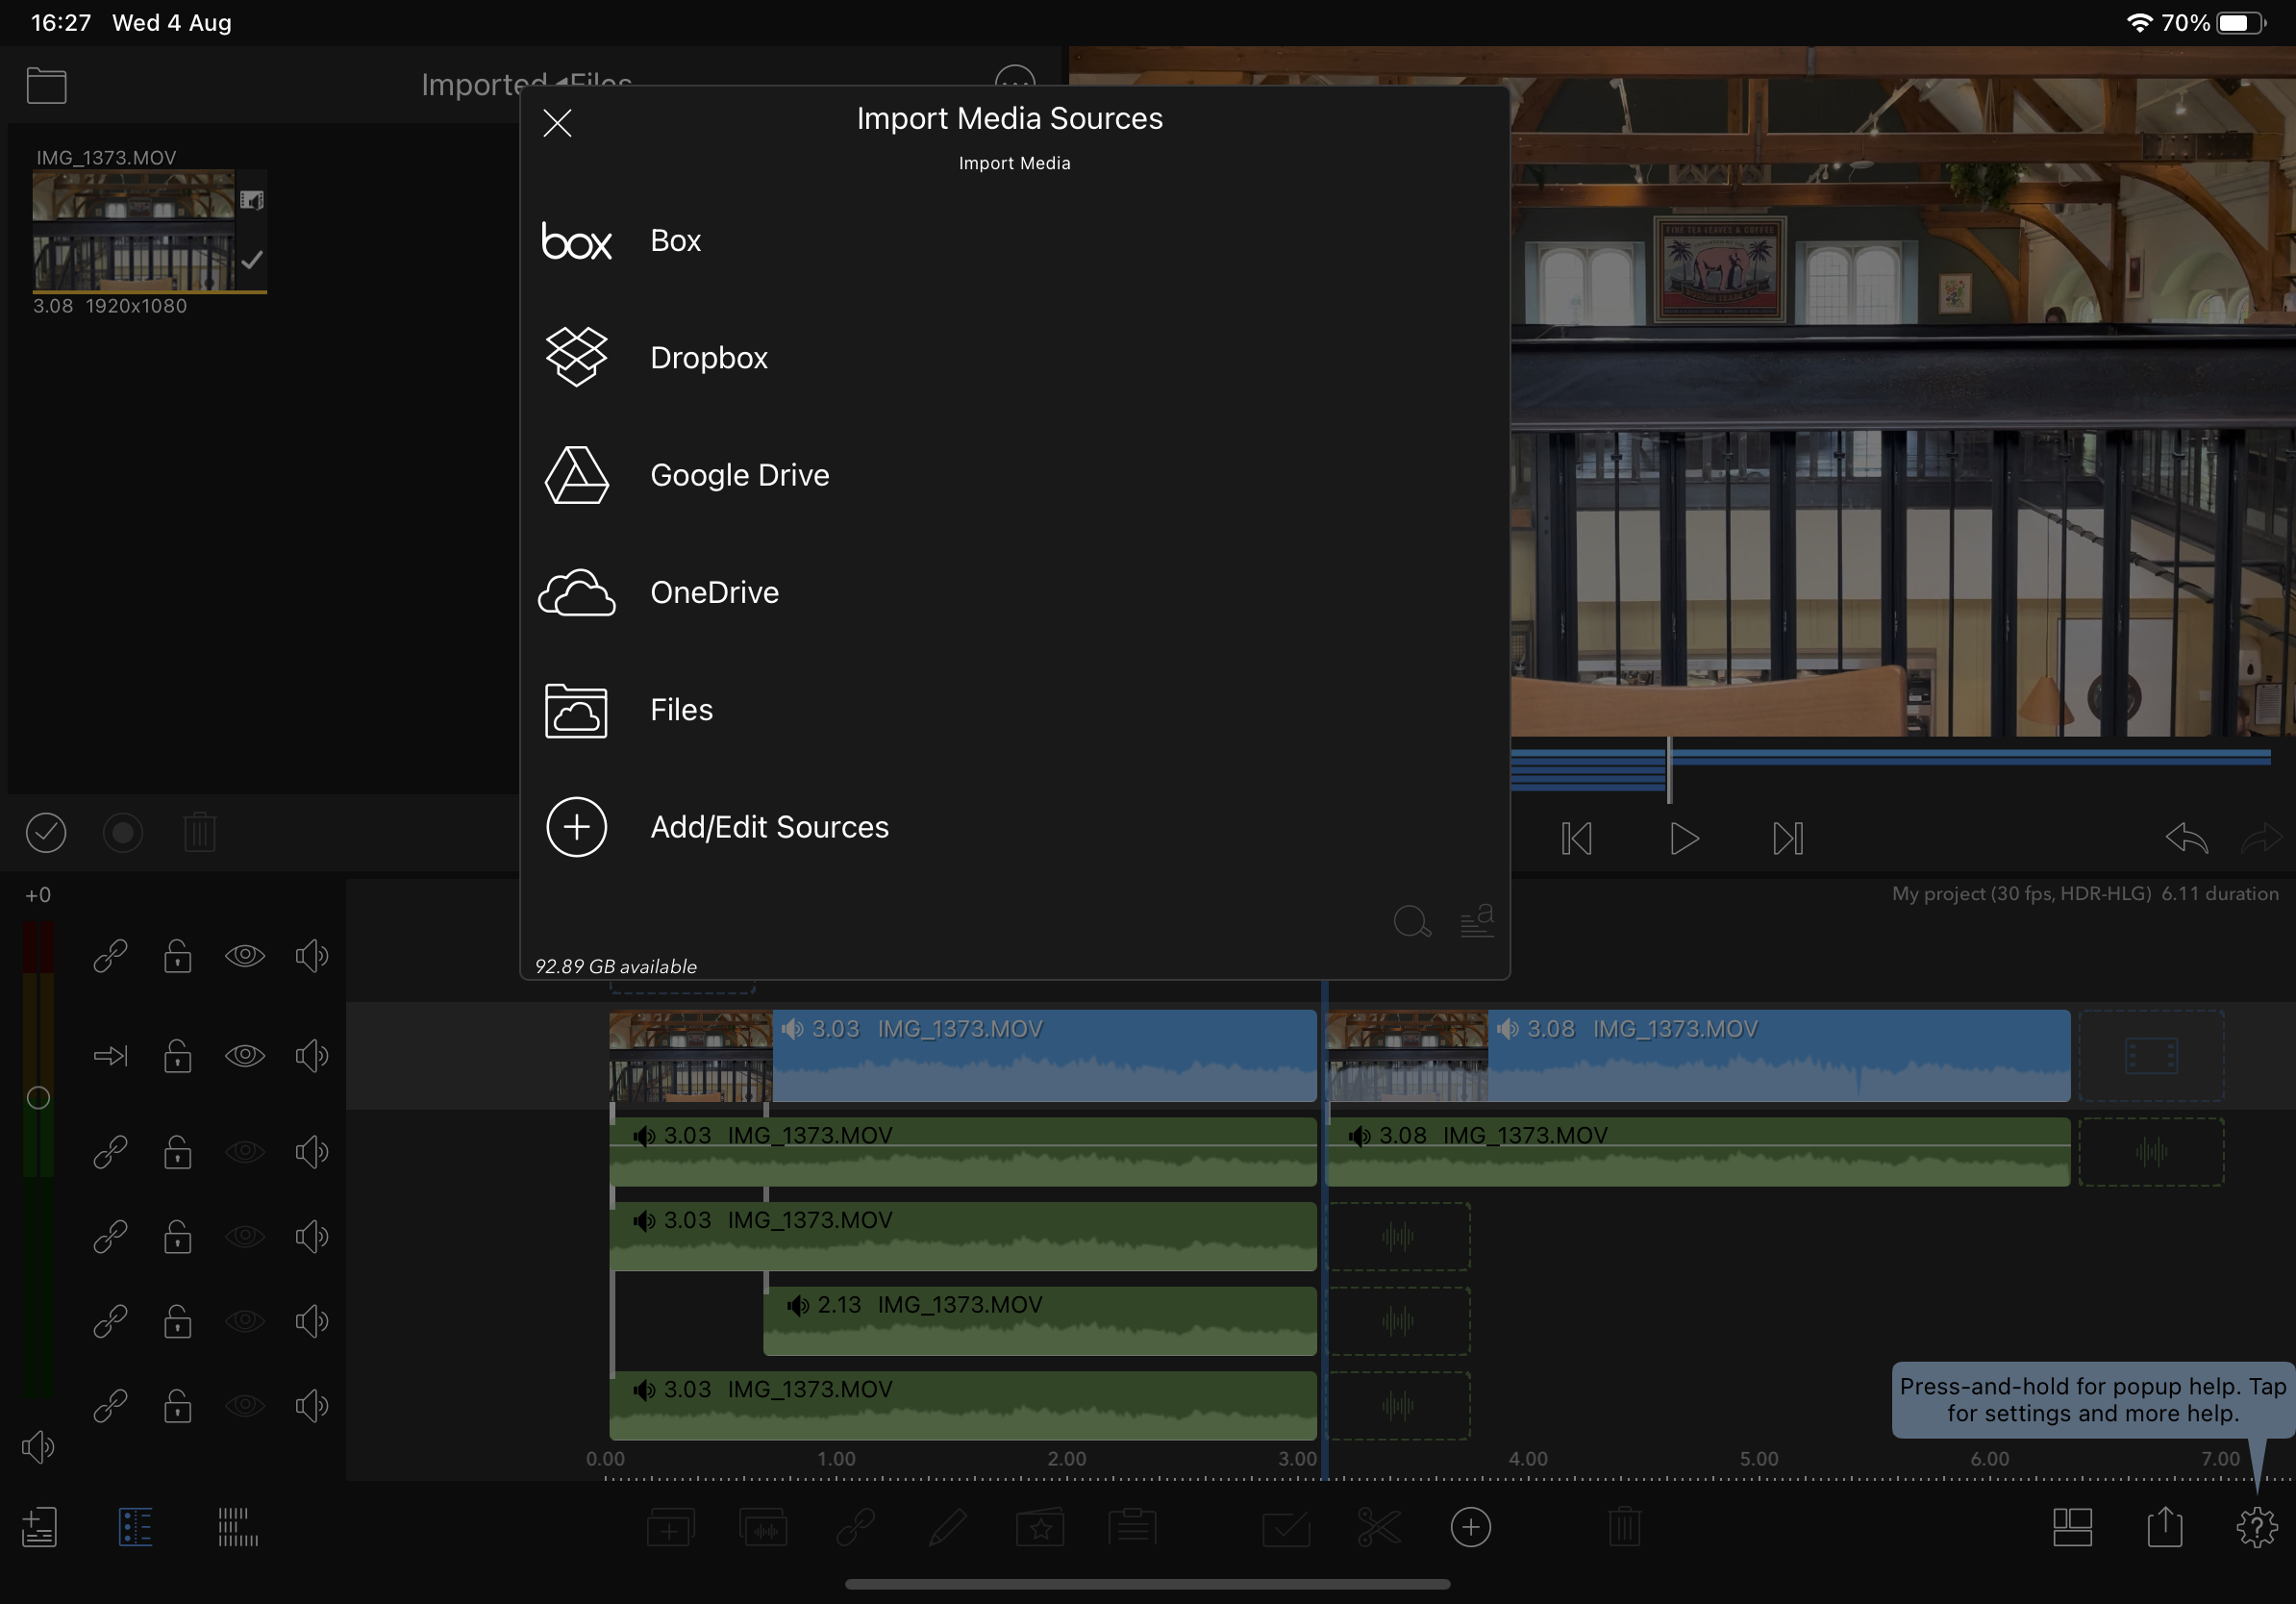
So you've filmed your footage, and now you want to import it into LumaFusion. The app supports all sorts of video file formats, including MP4, M4V, Quicktime and more. It also supports most standard audio and image files. Hit the top button featuring three dots (pictured) and select your input source, which can include iCloud Drive, Dropbox, Google Drive or external storage (check out the best external hard drives if you're after more space).
Once you've imported your clips, you'll need to create a project in order to edit them. All you have to do is tap the + button at the bottom of the interface, and give your project a name. You can then drag your clips from the 'imported' box right down into the timeline.
02. Trimming and editing your clips
(Image: © Future)
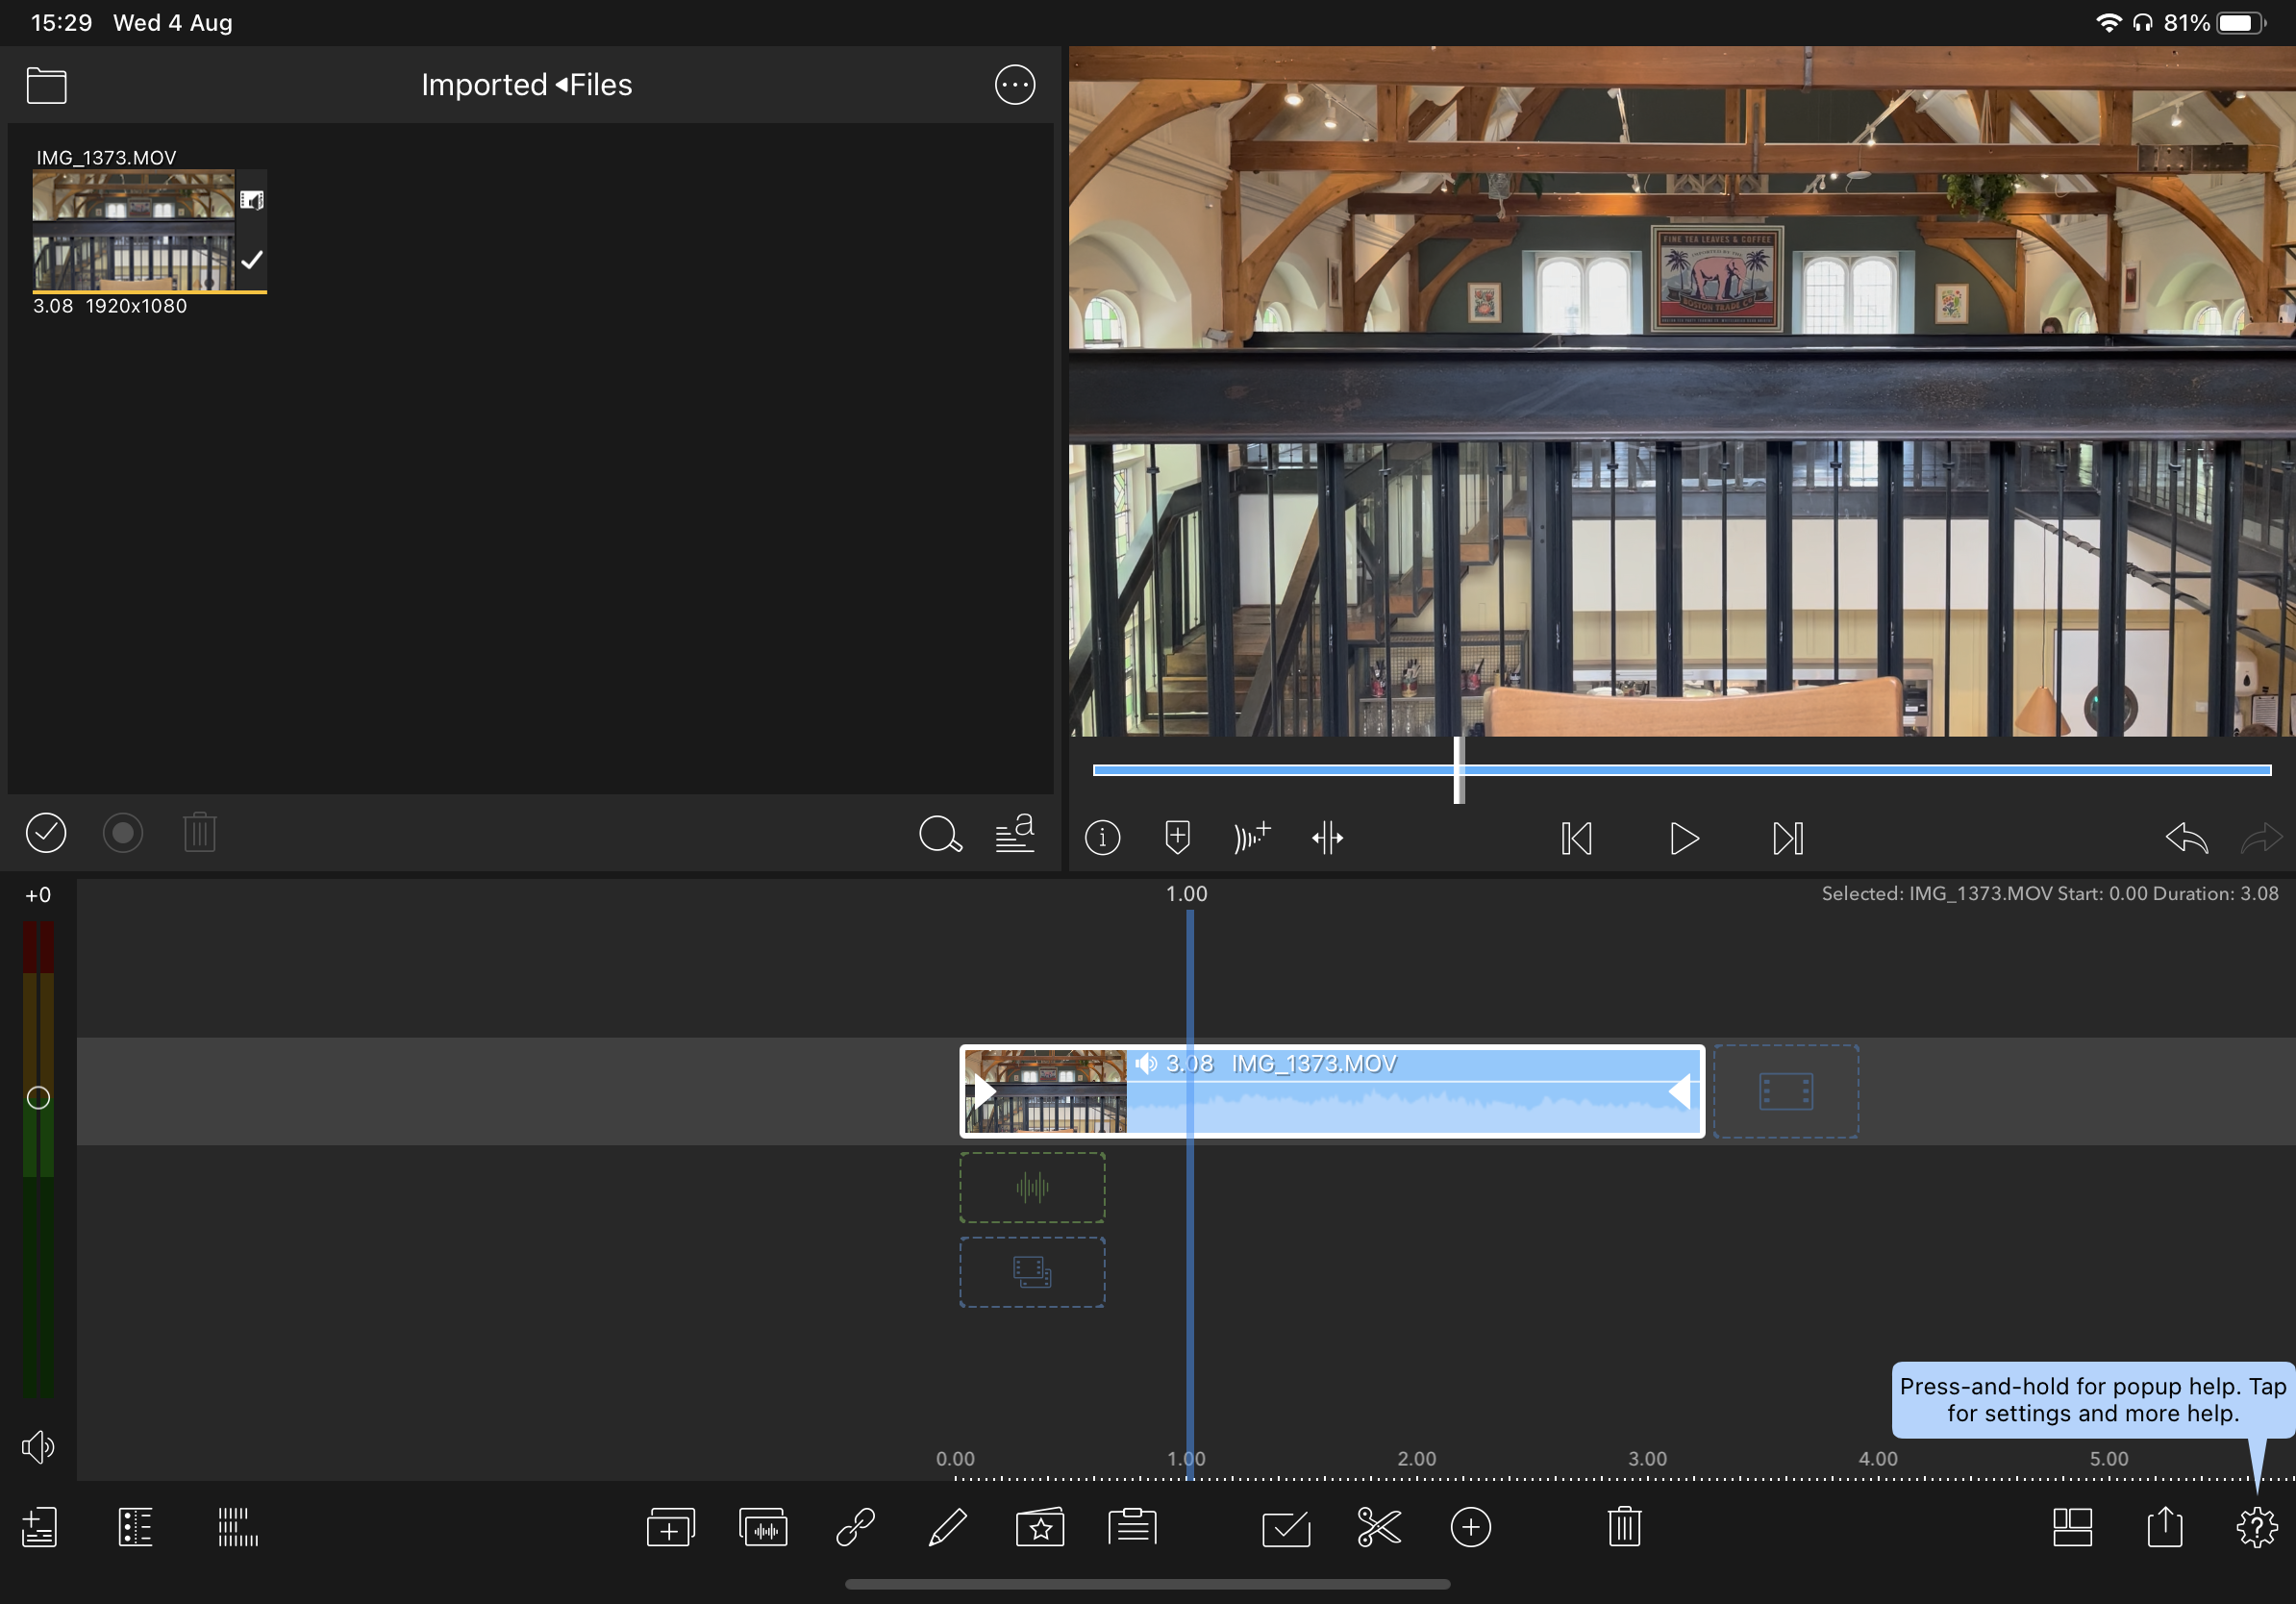
This is the fun part! If you want to trim either the start or end of your clips, the easiest way is to simple drag from either end using your finger or stylus. To split a clip somewhere in the middle, tap anywhere on the timeline and slide it either left or right. The scrubber bar will remain in the centre of your screen, letting you precisely select a point to split your clip. Once you've chosen it, all you have to do is hit the scissors icon at the bottom of the screen.
03. Transitions
(Image: © Future)
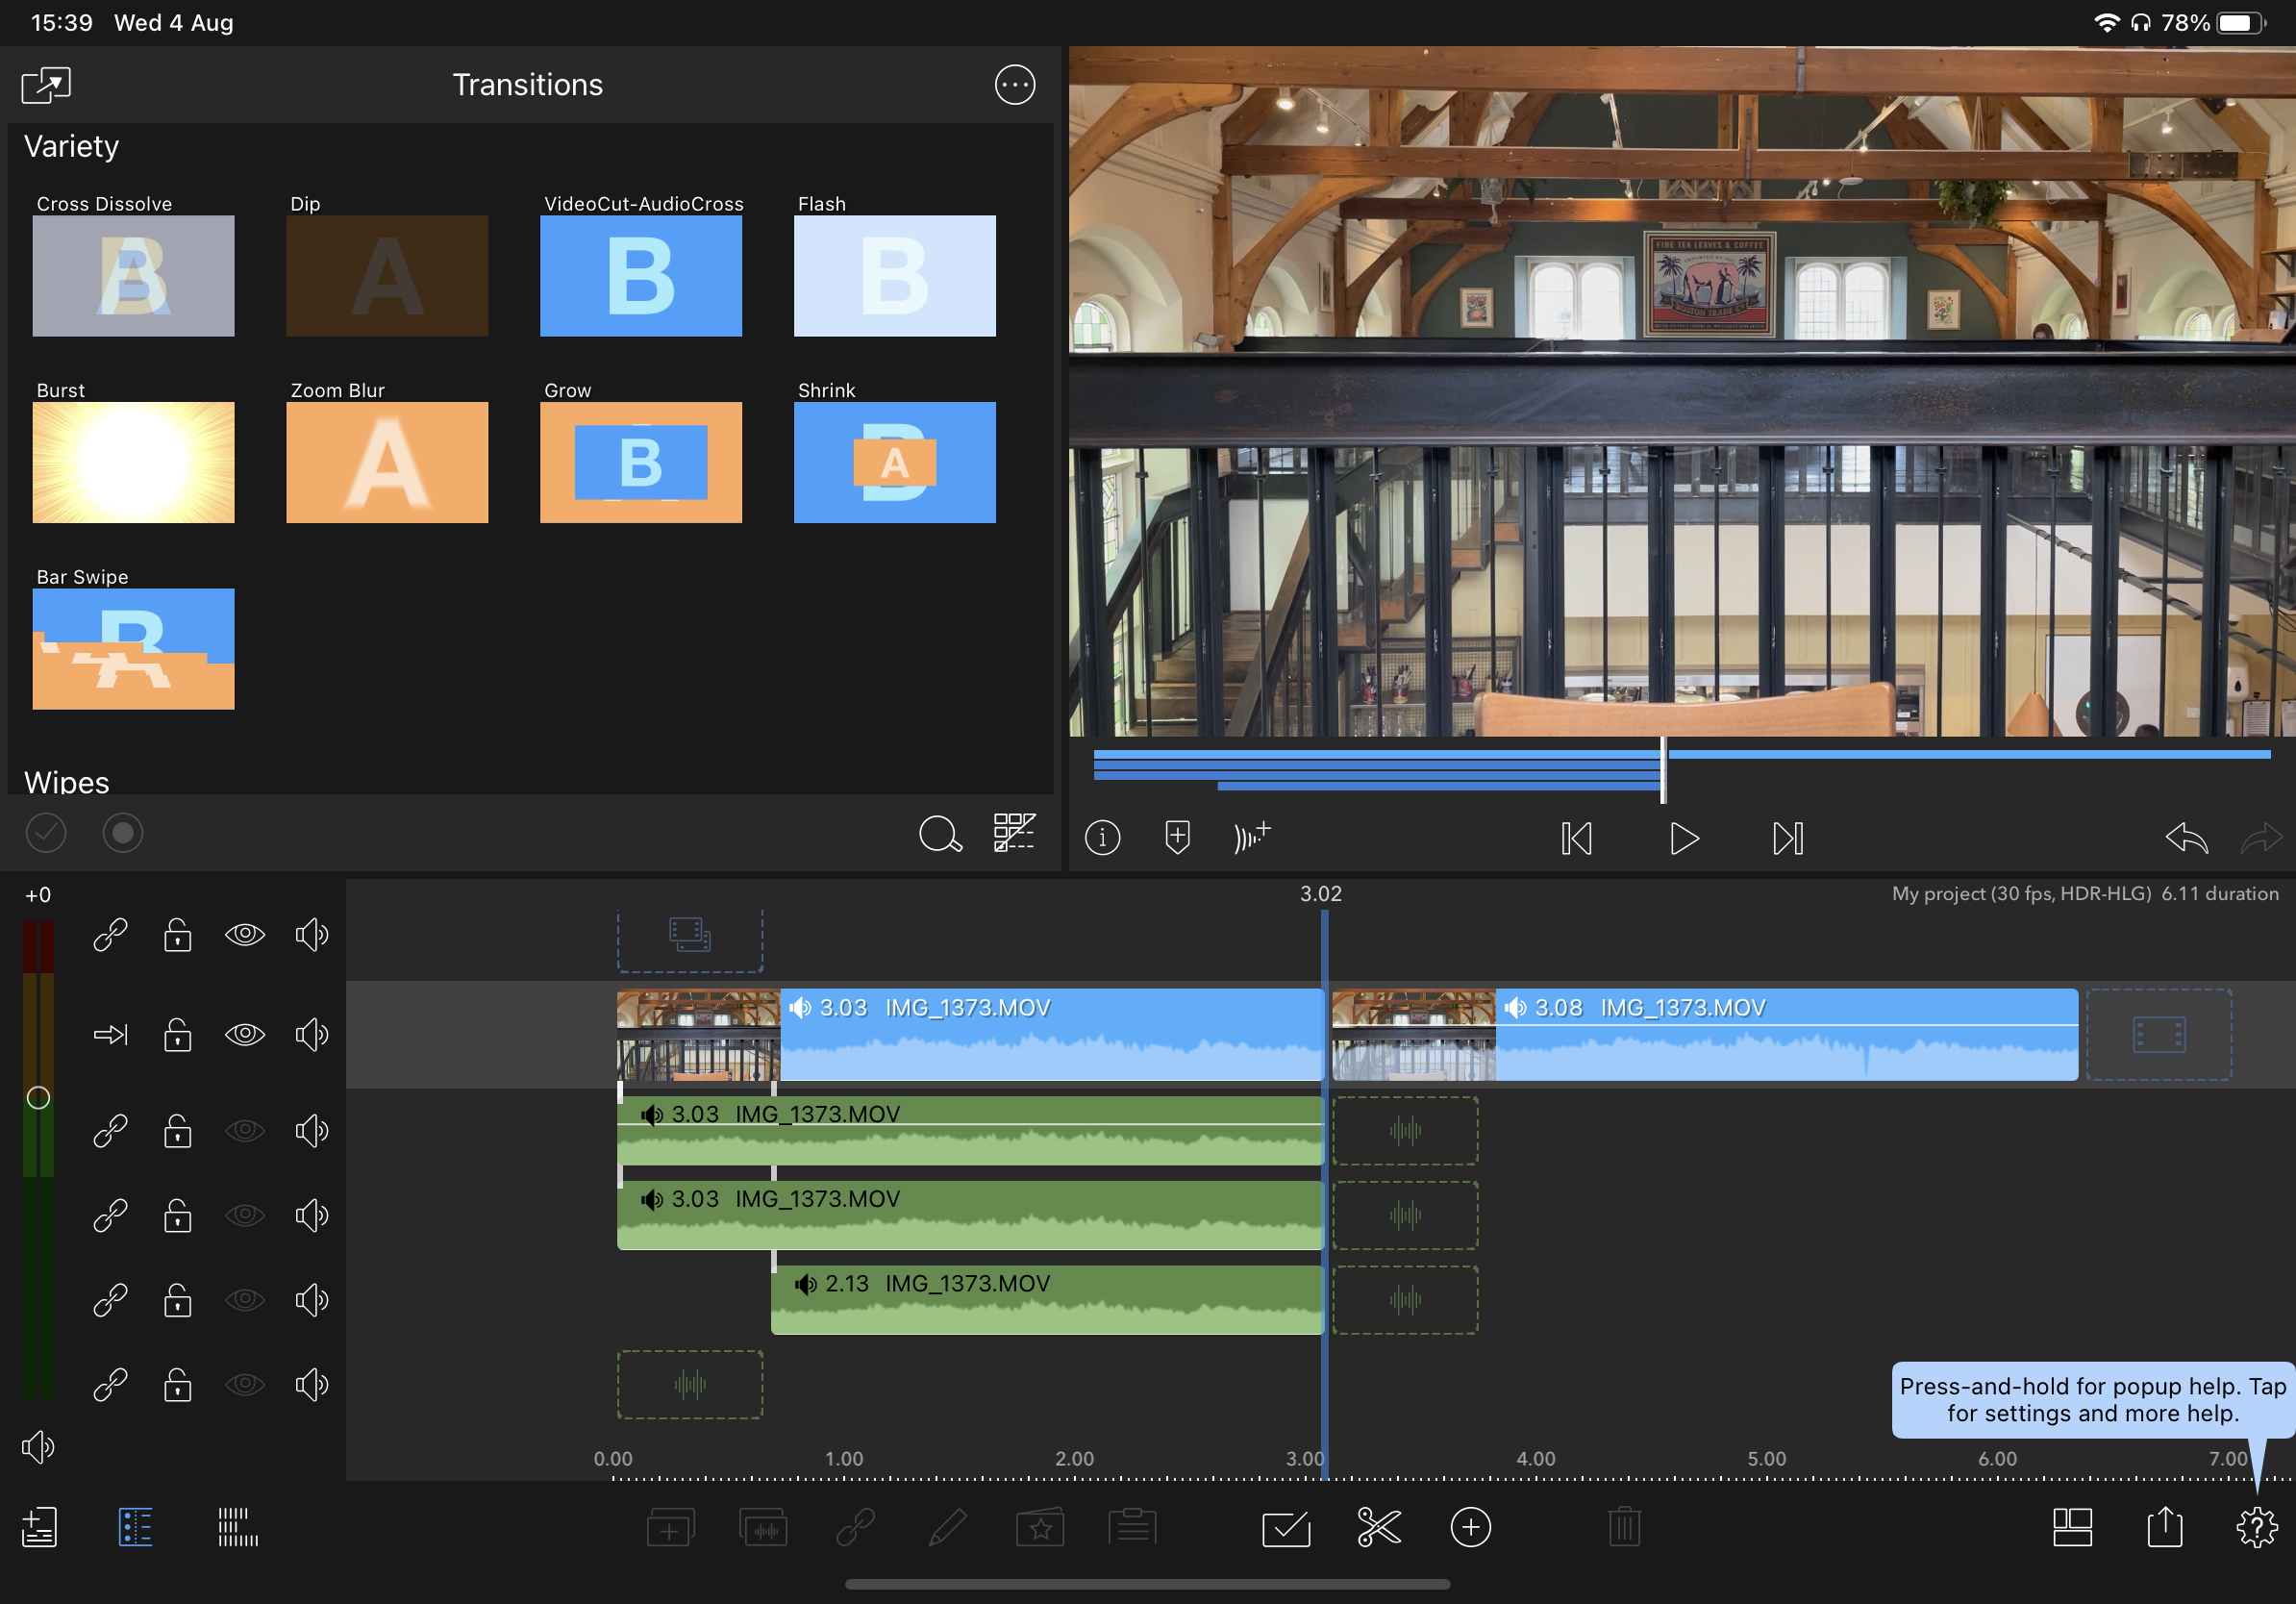
If you don't fancy a simple jump cut between clips, LumaFusion has plenty of attractive transitions built in. To access these, all you have to do is select Transitions via the Sources box (in the top left). This will switch the view from your imported clips to a list of available transitions, including fades, wipes, pushes and slides.
All you have to do is drag the transition onto the timeline and place it between the two relevant clips. Once it's on the timeline, you can edit the length of it just as you would any clip – by dragging from either side. For more detailed information on transitions, take a look at LumaFusion's official guide below.
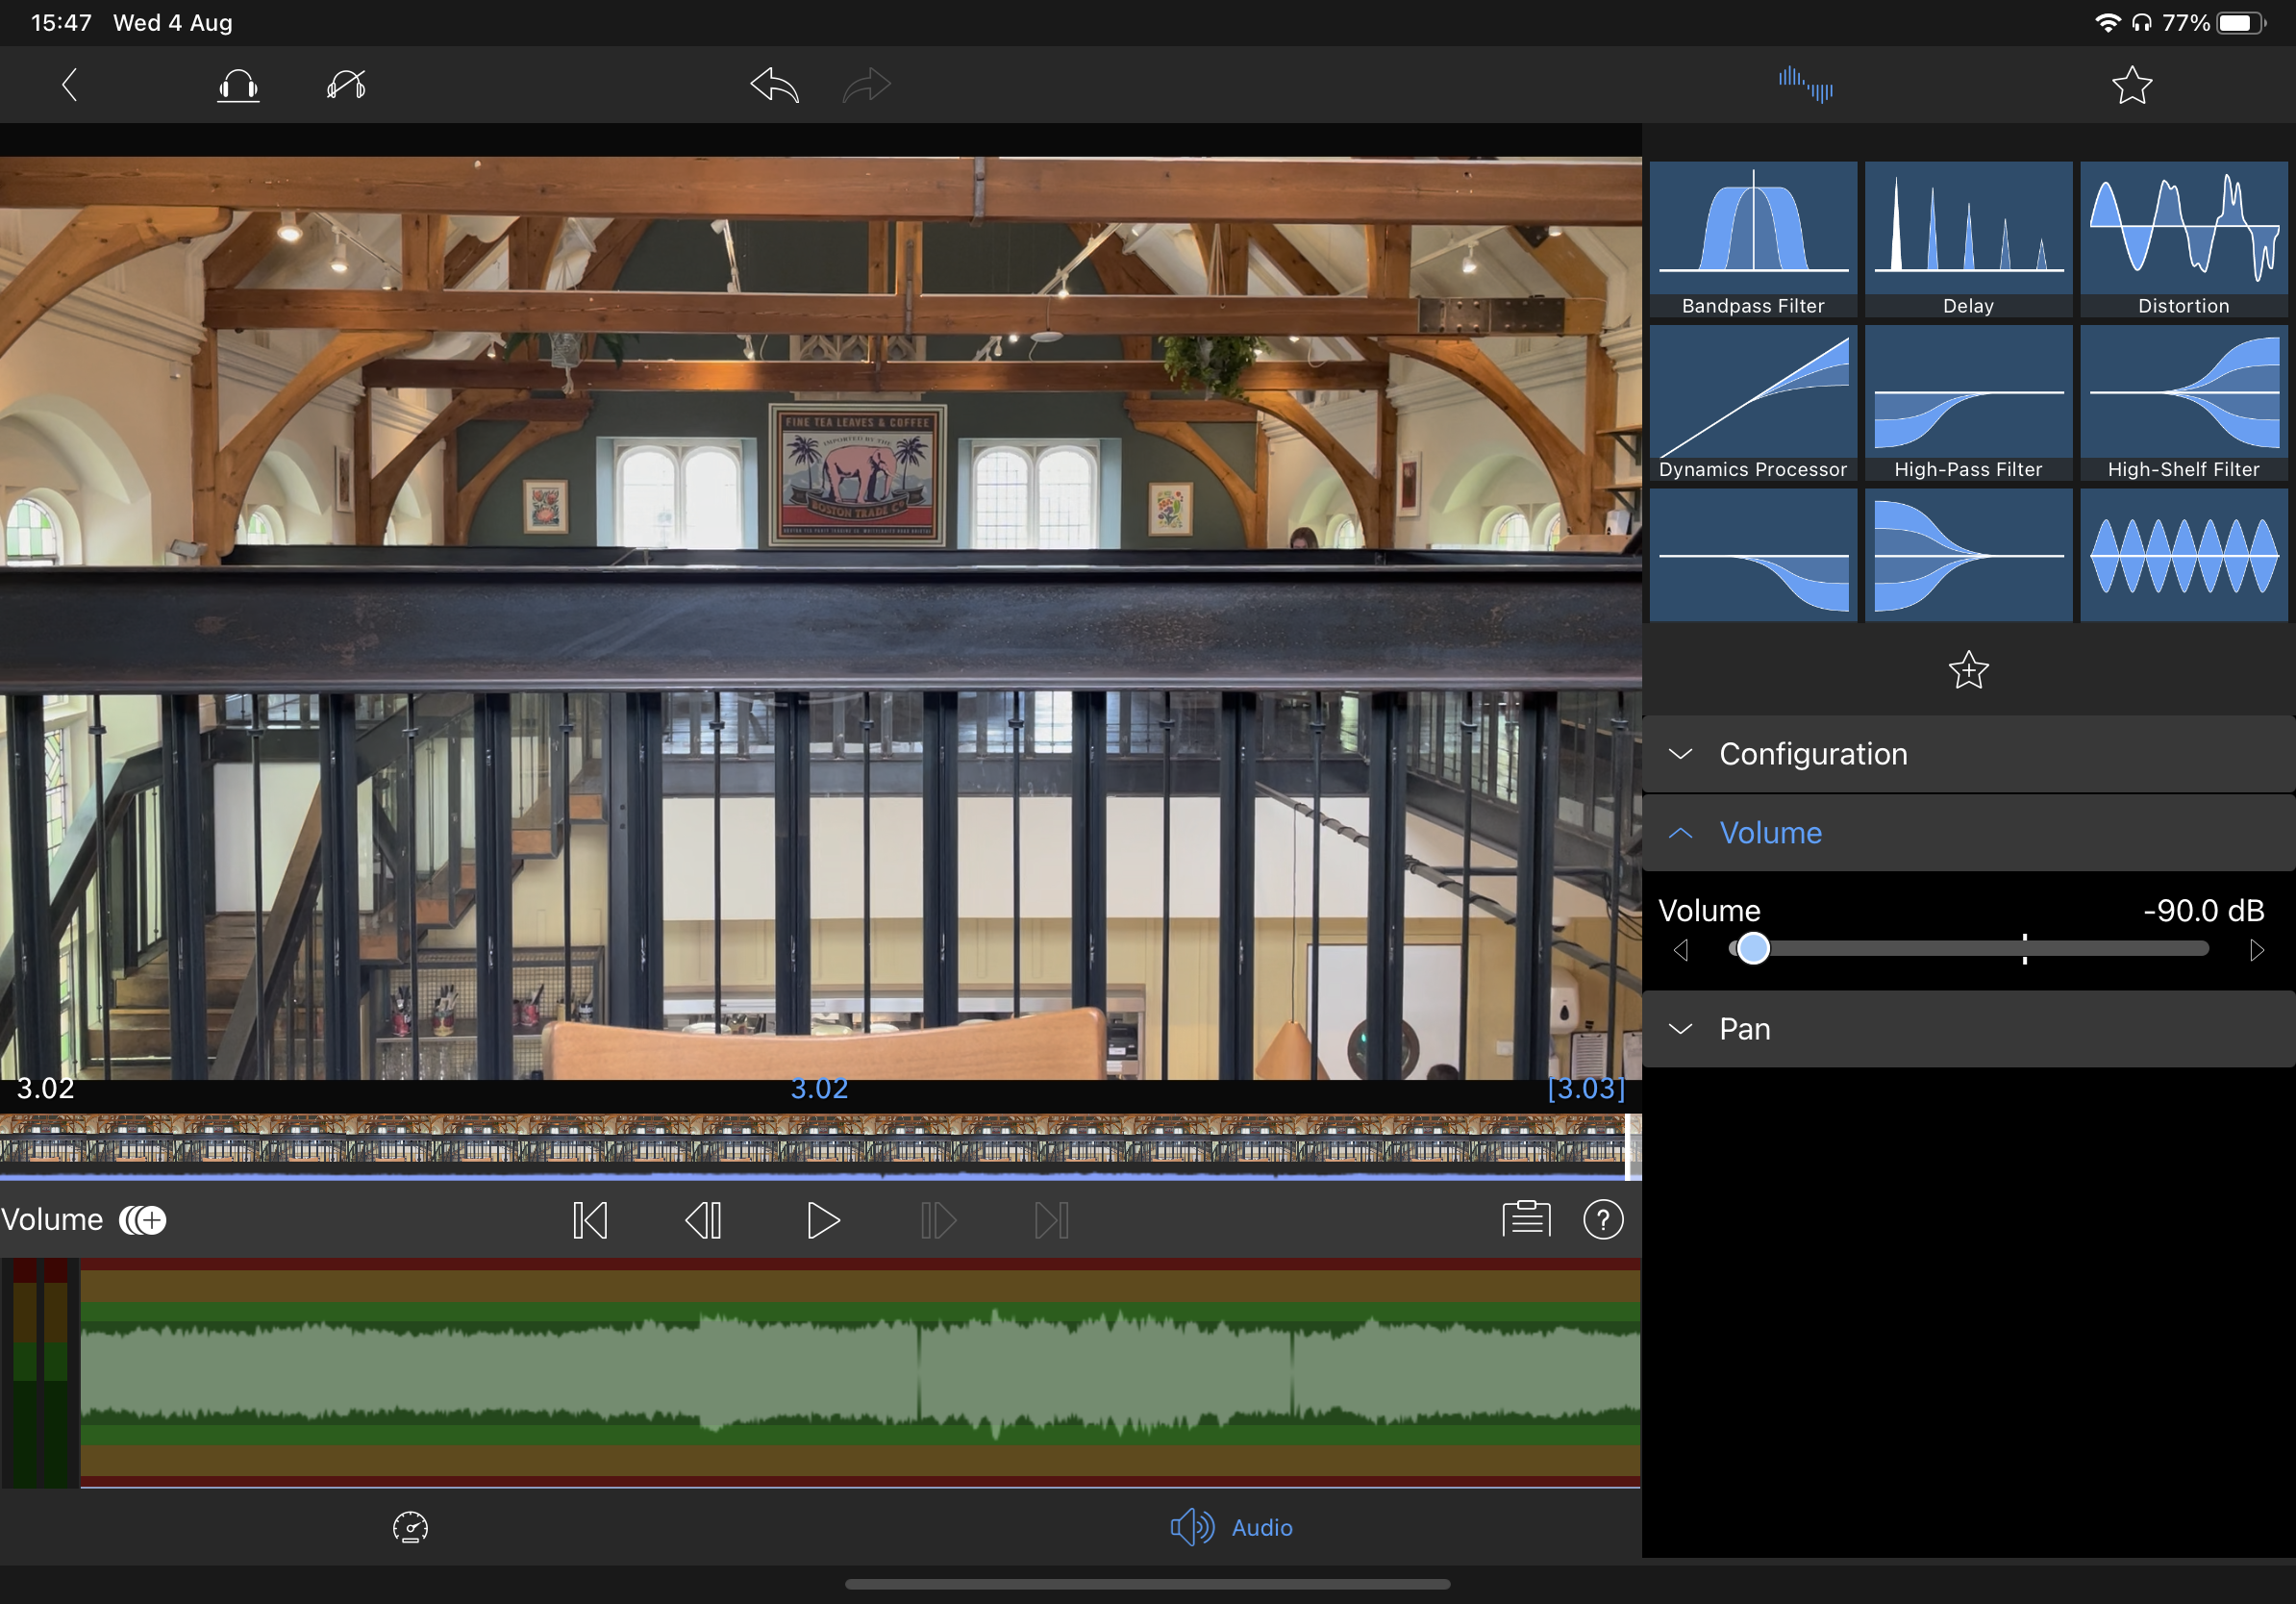
04. Editing audio
(Image: © Future)
LumaFusion's audio editing tools are almost as impressive as the video options – and can feel just as daunting. The first thing you'll want to do is separate the audio from your clip in the timeline. Then, select the audio channel and tap the edit icon (pencil) at the bottom of the screen. This will bring up all sorts of options such as volume, pan and distortion tools.
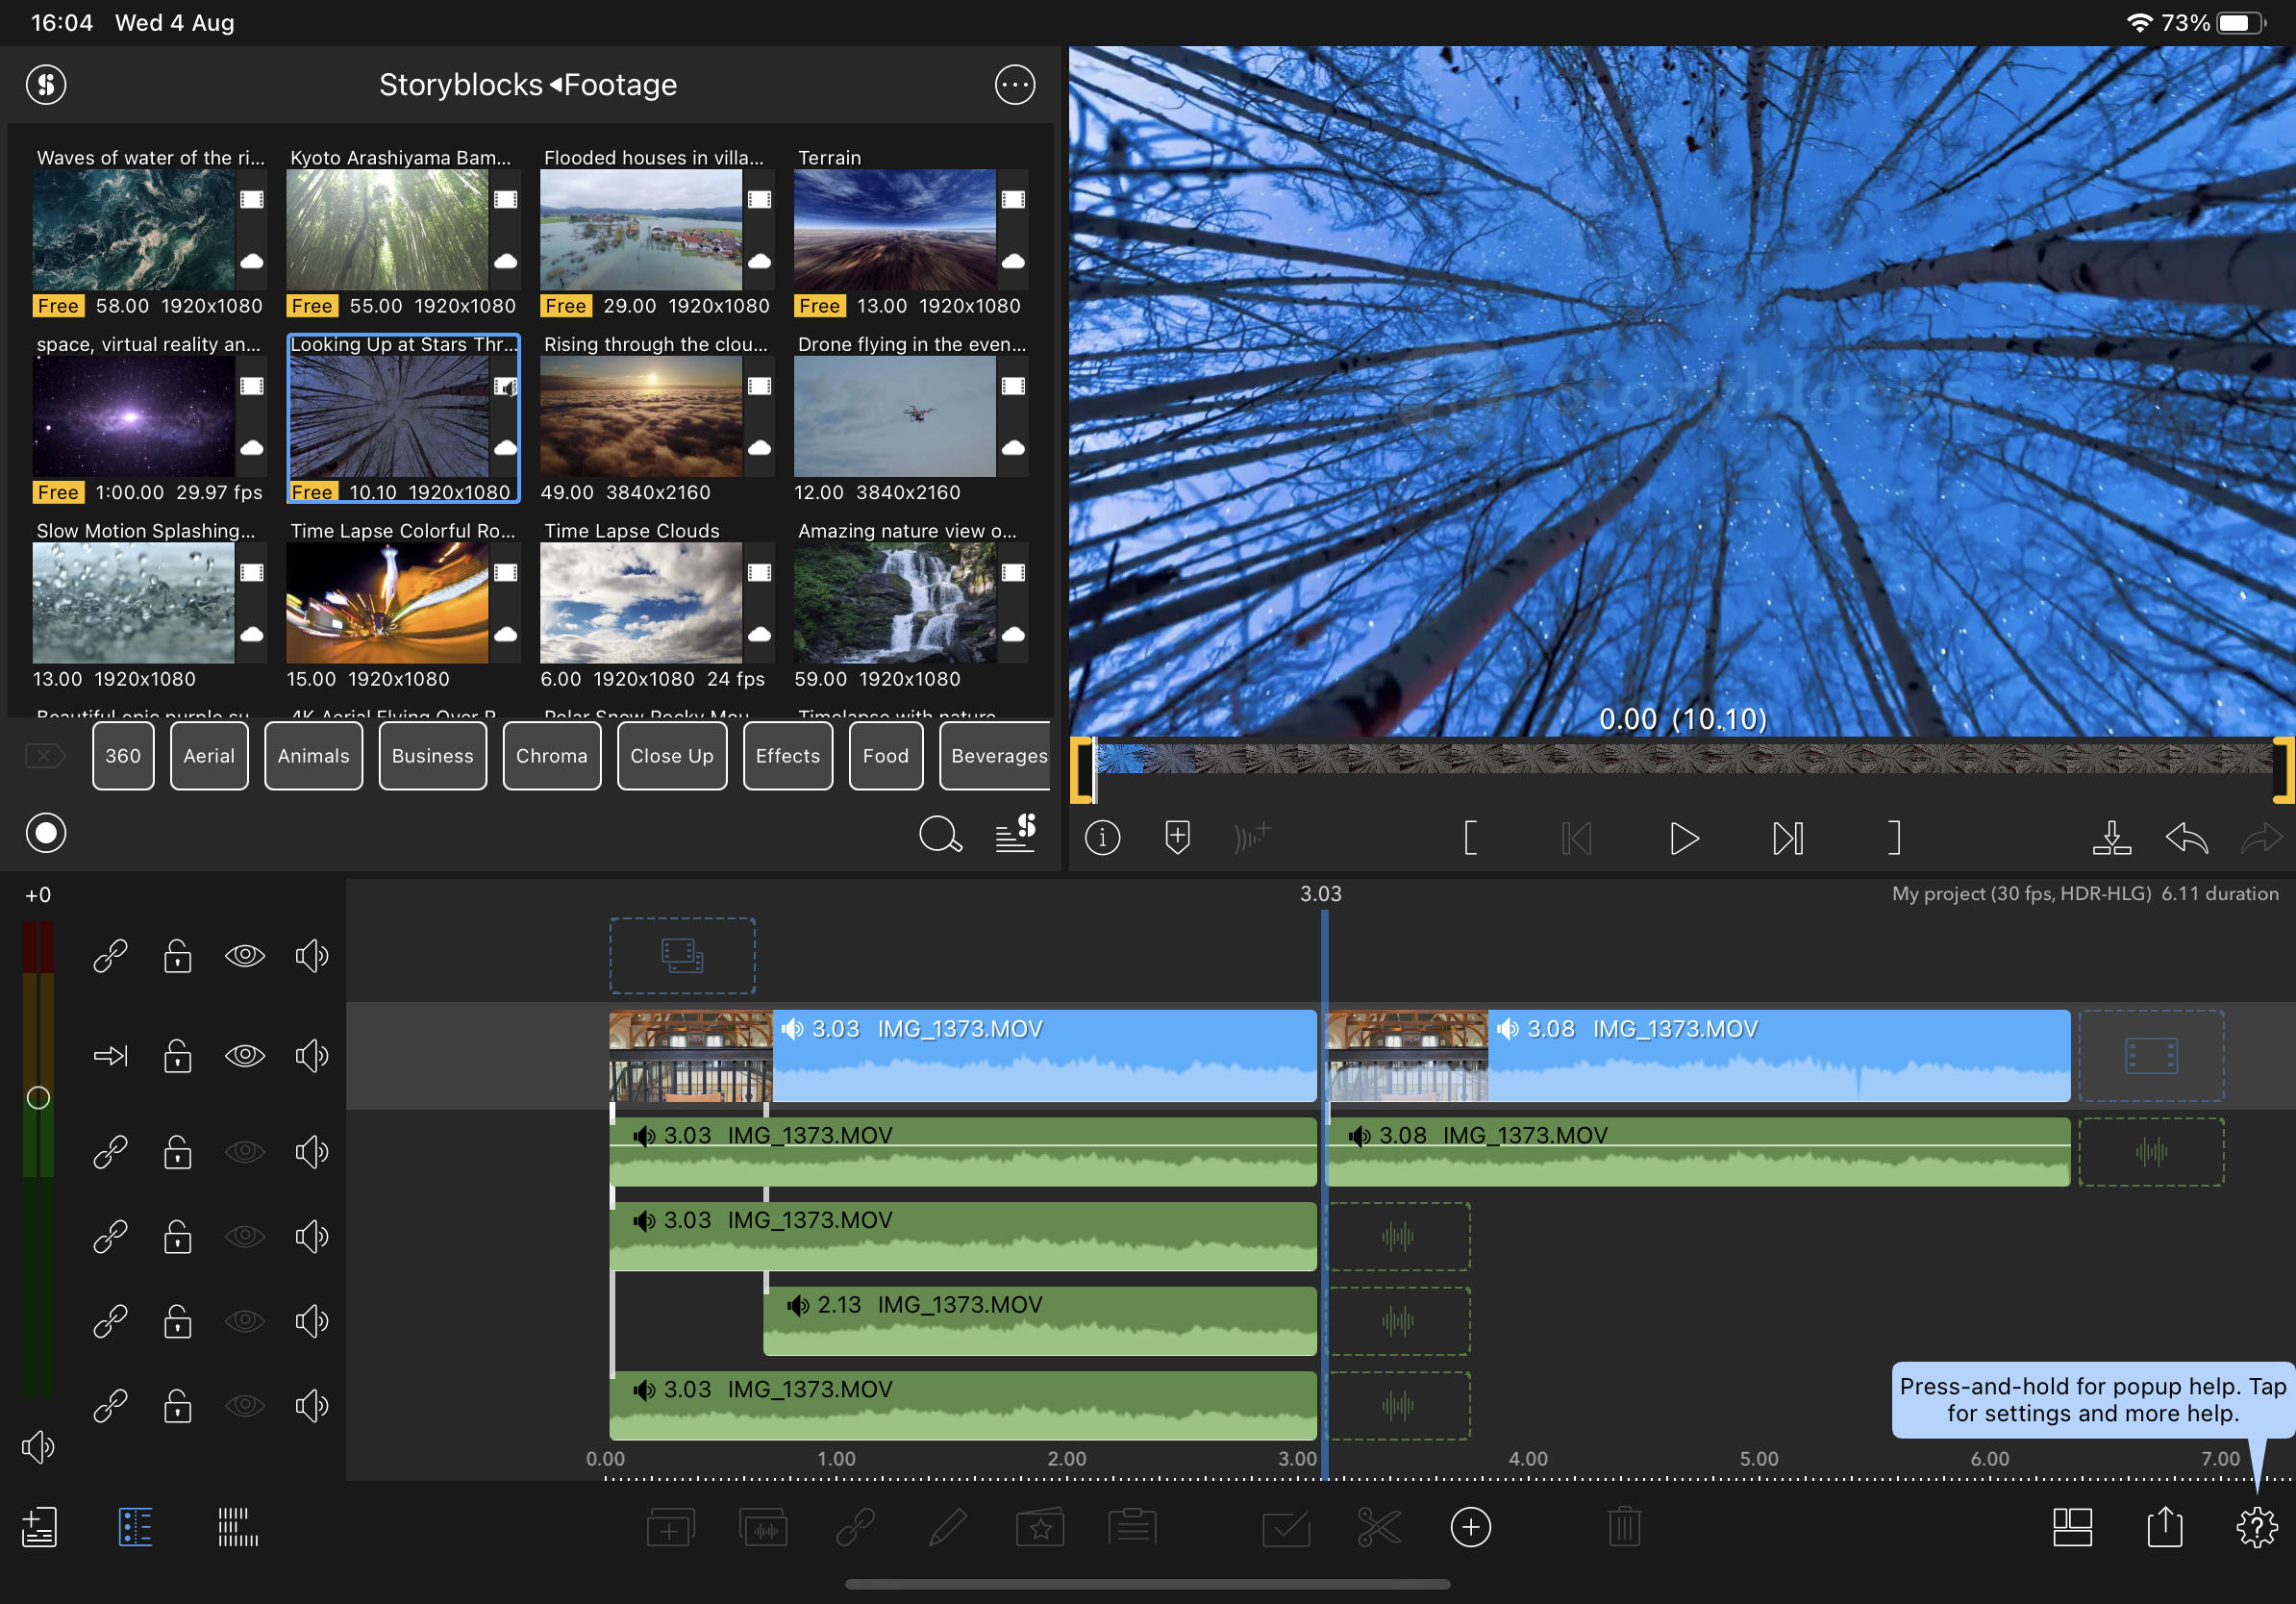
05. Storyblocks
(Image: © Future)
Need some extra footage? With Storyblocks, you can access to a royalty-free stock library of video content, backgrounds, music and sound effects. Just like transitions, this is accessed via the Sources menu in the top left of your screen. Clips will feature a watermark in preview mode, but this will disappear when the footage is added to your timeline. But it's worth keeping in mind that the library of free clips is very small – in order to access everything, you'll need to pay for a subscription (via the app store) at either $9.99 per month or $69 per year.
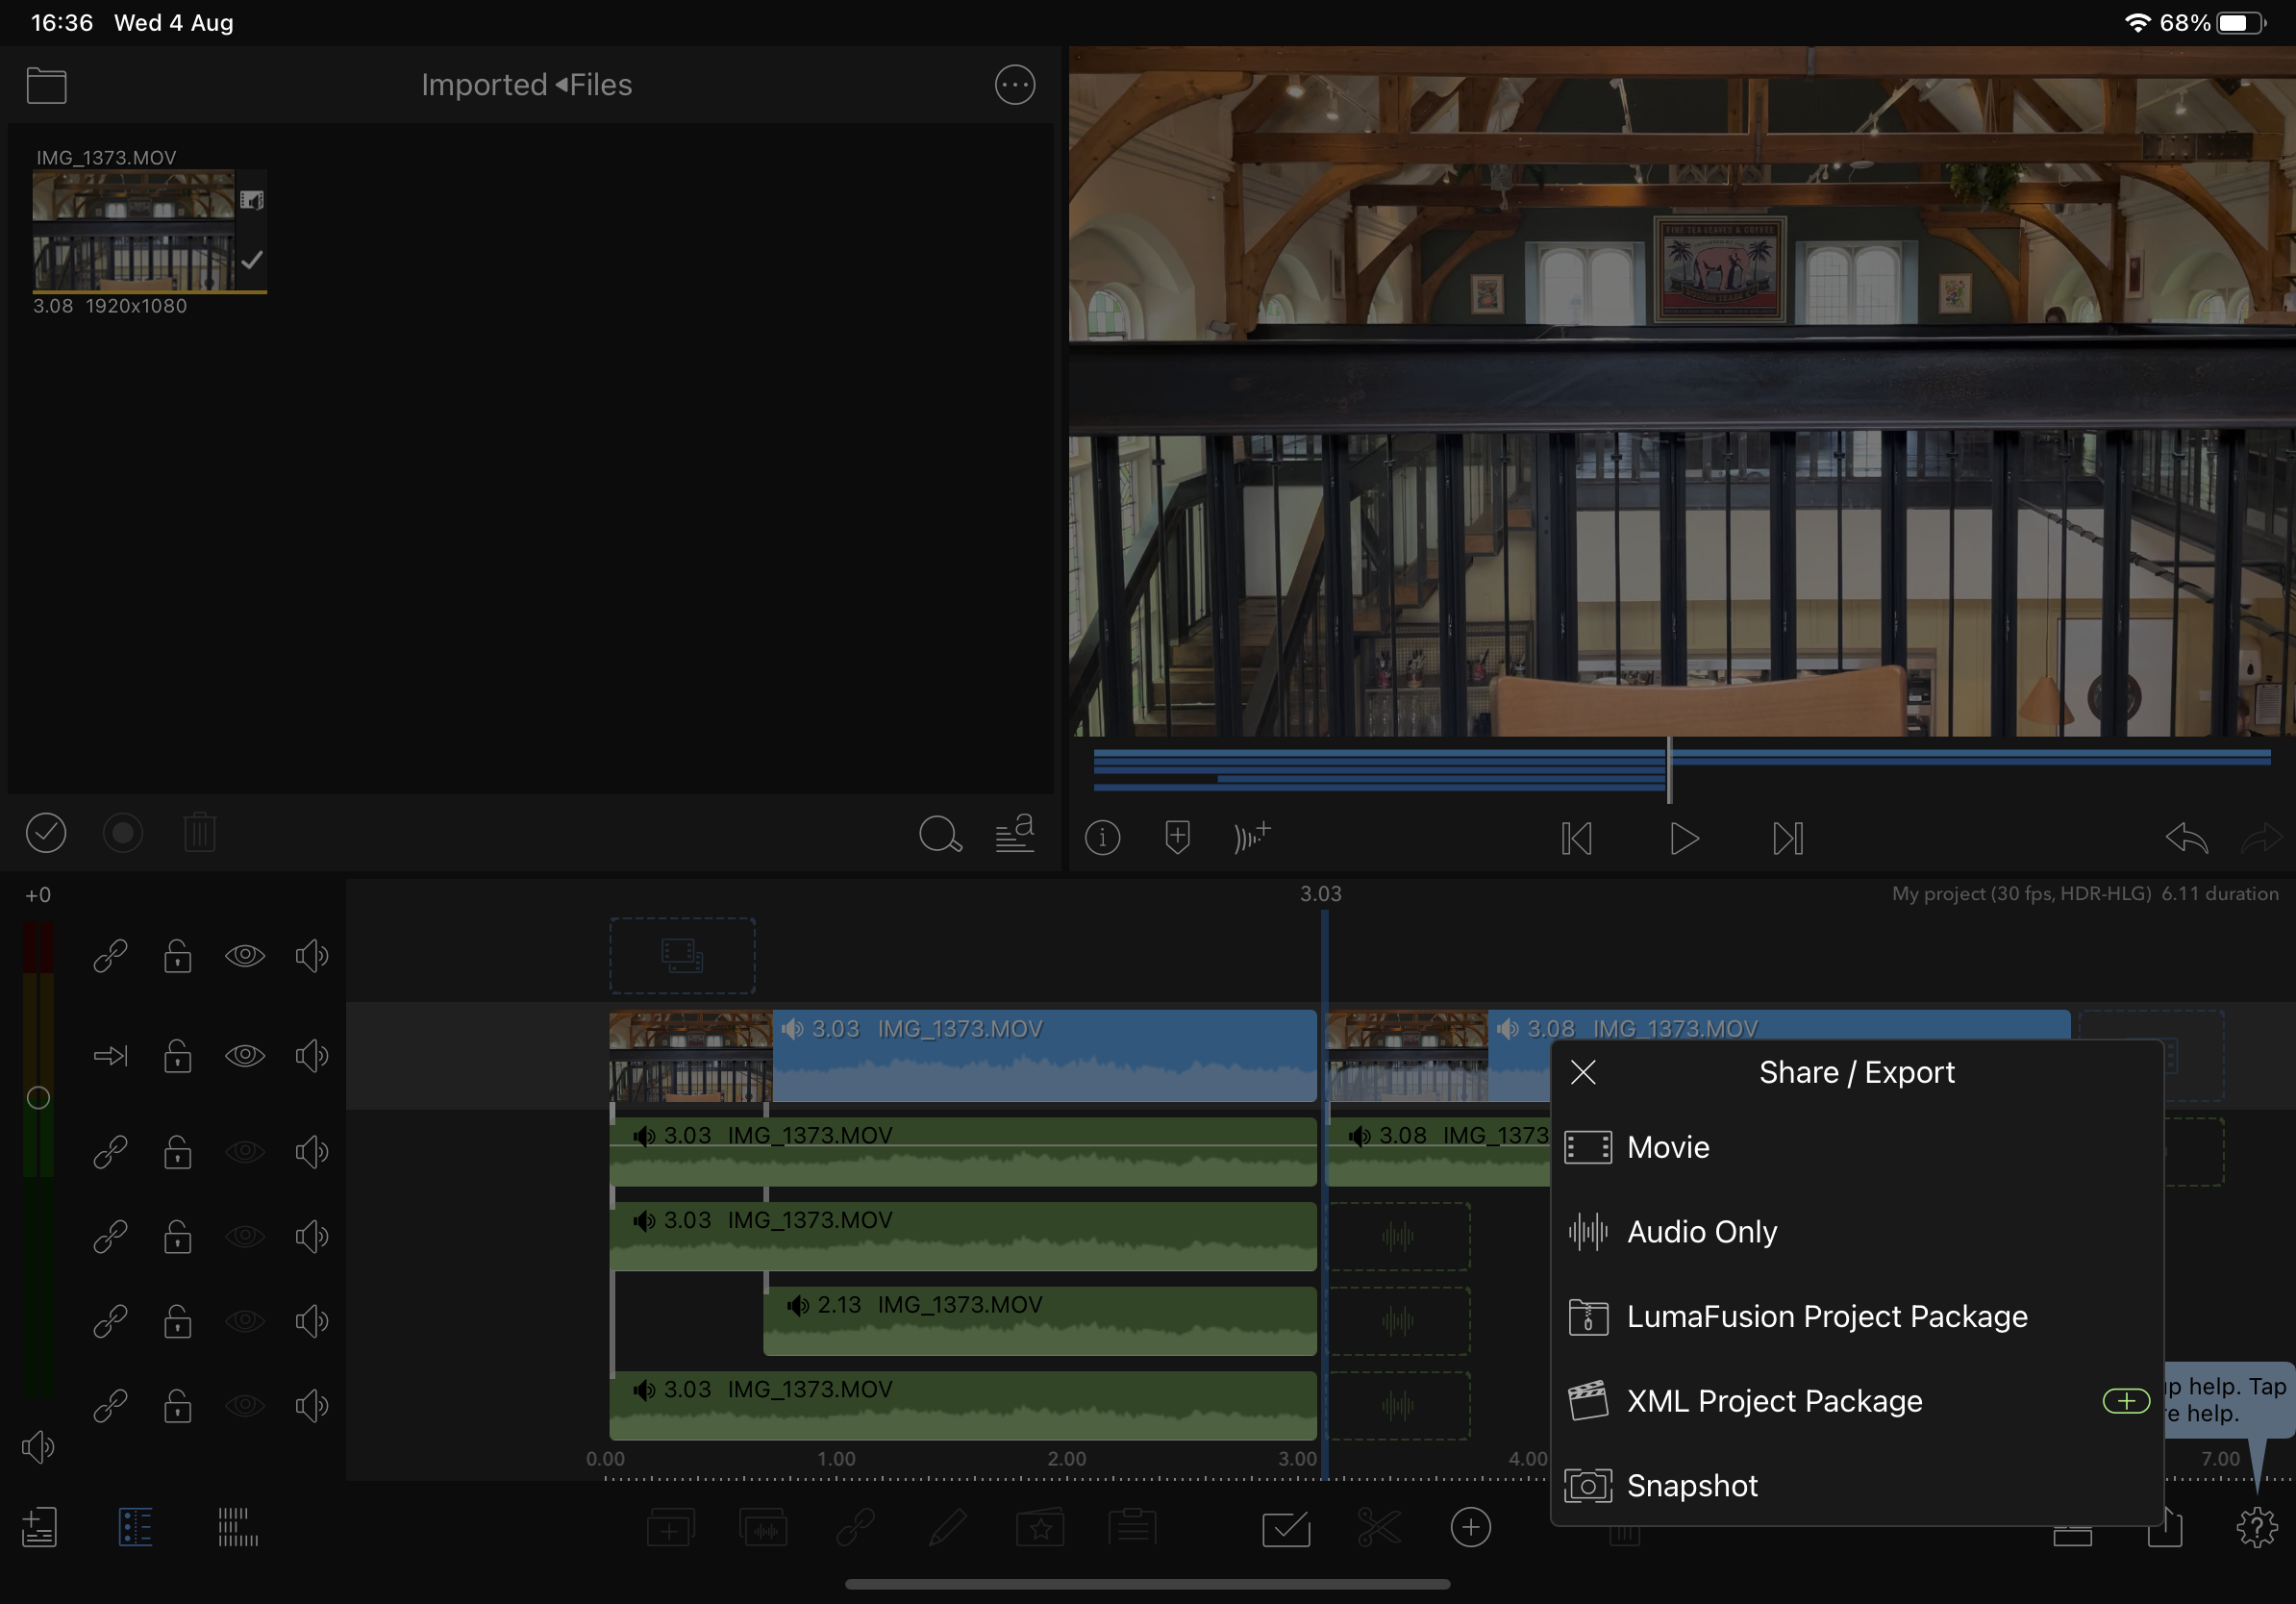
06. Exporting your video
(Image: © Future)
When you've finished editing your video, the final step is, of course, to share it. All you have to do is tap the Share/Export button in the bottom right of the interface. This will let you export your masterpiece as a movie or audio only, and you can either save it to your iPad's camera roll, to iCloud drive, or even directly to YouTube or Vimeo.
This is, of course, a very basic introduction to LumaFusion. The app is incredible feature rich, and when combined with the raw power of the M1 iPad Pro, it's an absolute portable powerhouse. LumaFusion is also available for iPhone, but to get the most of it, you'll definitely want to use the larger screen of an iPad. Check out today's best iPad deals below, and head to the Apple Back to School sale for more offers.
Read more:
- 5 iPhone 13 features our readers REALLY want to see
- The best drawing tablets: our pick of the best graphics tablets
- Microsoft Paint FINALLY gets a new look (but was it worth the wait?)

Daniel Piper is senior news editor at Creative Bloq, and an authority on all things art, design, branding and tech. He has a particular penchant for Apple products – some corners of the internet might call him an 'iSheep', but he's fine with this. It doesn't bother him at all. Why would it? They're just really nicely designed products, okay? Daniel is also a comedian and national poetry slam champion, and his favourite Bond is, obviously, Sean Connery.
Related articles
How to Edit a Video Taken From Your Ipad
Source: https://www.creativebloq.com/how-to/lumafusion-ipad-basics
0 Response to "How to Edit a Video Taken From Your Ipad"
Post a Comment